What to Do After You Shoot an Animal in Africa: Trophy Preparation Guide
The shot creates the moment. What you do next determines how it’s remembered.
- New Creation Taxidermy
What To Do With Your Animal After The Shot
You’ve taken the shot. | The adrenaline fades. | The bush goes quiet.
And for a moment, everything stands still.
Most hunters think the hard part is over.
It’s not...
This is where your trophy is either protected or permanently damaged.

The First Mistake Most Hunters Make
They relax too soon.
I remember a first-time hunter who took a beautiful impala. Perfect shot. Clean recovery. Big smiles, photos, the whole moment.
But in the excitement, the animal lay in the sun for nearly an hour.
By the time the skinning started, the damage had already begun. Weeks later, when the mount came back, there were patches where the hair had slipped.
That’s the part nobody tells you:
The trophy isn’t lost in the shot—it’s lost in what happens after.
From the second the animal drops, two things start working against you:
heat and bacteria
As highlighted in the guide, these are the number one enemies of any trophy .
Your Only Goal Right Now
Forget everything else. Focus on three things:
Cool it fast. Keep it clean. Keep it free from unnecessary blood.
Simple—but not negotiable.
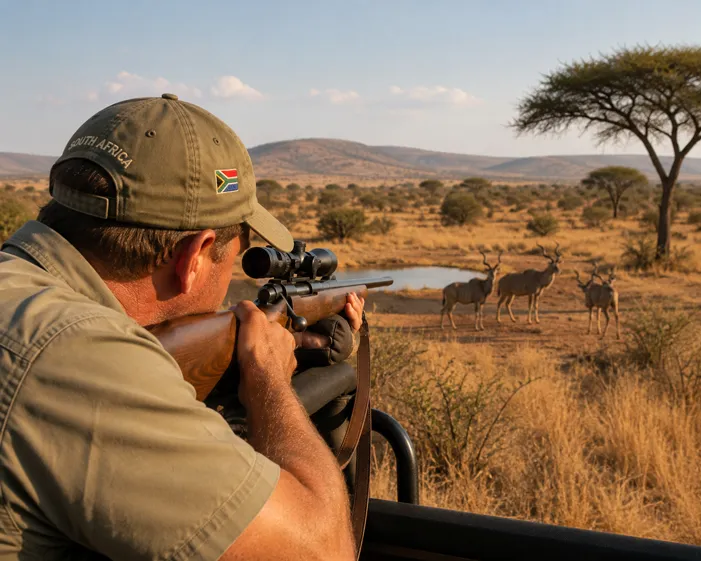
Immediately After the Shot
Confirm the Animal & Approach Carefully
Always approach with your PH (Professional Hunter).
Not just for safety, but for control of the situation.
A good pH is already thinking ahead.
Where is the shade?
How do we position the animal?
What mount is the hunter likely to want?
This is where experience starts protecting your trophy before a knife is even touched.
Take Your Trophy Photos (Properly)
This is your moment—don’t rush it.
But do it right:
Clean off blood around the nose and mouth
Position the animal naturally
Keep the tongue in and eyes tidy
Take front, side, and detail shots
Because once skinning starts, this moment is gone forever.
Here are the steps you can follow:
Step 1: Recover the Animal Properly
Speed matters—but how you move the animal matters more.
Move it into the shade immediately
Do not drag it through dirt or bushes
Use a tarp, carry, or slide carefully
I’ve seen how a kudu cape was ruined because it was dragged downhill through thorn scrub. At the time, it seemed like the quickest option.
Later, every scratch showed up on the finished mount.
What feels like a shortcut in the field becomes a permanent mark on your trophy.
Step 2: Protecting the Cape
If you’re planning a shoulder mount, this is critical.
Avoid dragging the neck at all costs
Keep the cape clean and free from blood
Position the animal so fluids drain away from the cape
Get it into the shade quickly
A clean heart/lung shot helps massively here.
Neck shots might drop the animal fast, but they often destroy the very part you want to mount.
Step 3: Decide Before You Cut
This is where things go wrong—fast.
You must decide upfront:
Rug (flat skin)
Shoulder mount
Because the cuts are completely different.
I’ve seen hunters change their minds halfway through skinning. By then, it’s too late.
A rug uses a straight belly cut
A shoulder mount requires a precise Y-cut behind the horns
Cut wrong once, and no taxidermist can undo it. You may end up needing to replace the entire cape.
Step 4: Professional Skinning Matters
This is not the time for guesswork.
Clean, controlled cuts make all the difference:
Straight lines
Shallow cuts
Care around the face, ears, and eyes
This is where experience shows.
A rushed or inexperienced skinner might get the job done—but at the cost of the final result.
And remember: you’re not just skinning—you’re preparing a display piece that could last a lifetime.
Step 5: Caping, Turning & Salting
This is where most trophies are quietly lost.
I’ve seen perfect animals ruined simply because the lips and ears weren’t turned properly. If the salt couldn’t penetrate, decay started from the inside.
The essentials:
Remove all meat and fat
Turn lips, ears, eyelids, and nose correctly
Use proper, non-iodised salt
Salt thoroughly, and repeat if needed
Keep everything cool and ventilated
Done right, this step determines the majority of your result. In fact, field preparation can determine up to 90% of trophy quality.
Delivery to the Taxidermist
Even after all that work, you can still lose the trophy here.
Use breathable bags (never plastic)
Label everything clearly
Keep skins cool or frozen
Never leave them in a hot vehicle
It sounds basic, but these are the exact points where things go wrong.
Where Most Trophies Go Wrong
Not in the hunt.
In the small decisions after it:
Waiting too long before salting
Using the wrong salt
Poor turning of delicate areas
Heat exposure
Incorrect cuts
None of these feels like big mistakes at the time.
But they show up months later, when the mount doesn’t match the memory.
This Is Why Preparation Matters
A great trophy isn’t only created in a taxidermy studio.
It’s protected in the field.
That’s why we created the following:
👉 The Hunter’s Guide to Beautiful Trophies
A practical, step-by-step guide to help you:
Handle your animal correctly from the first minute
Make the right cuts
Preserve your trophy properly
Avoid costly, irreversible mistakes
Every Trophy Tells a Story.
I’ve seen two trophies from the same species, same farm, same week.
One came in clean and well-prepared and became a showpiece.
The other… had to be “saved” as best as possible.
Same hunt. Different outcome.
The difference?
What happened after the shot?
Final Thought
The hunt gives you the moment.
What you do next determines how that moment is remembered.
So don’t leave it to chance.
Get it right from the start.